Food self-sufficiency refers to the ability to provide for one’s own food needs by growing one’s own fruits, vegetables and other edible products in a sustainable and environmentally friendly manner. In this sense, having a self-sufficient vegetable garden has many advantages. Permaculture makes it possible to produce fresh, healthy food free of harmful chemicals.
Additionally, it reduces reliance on industrial food products, resulting in significant financial savings in the long term. Growing your own food also promotes a strong connection with nature, which allows you to follow seasonal cycles.
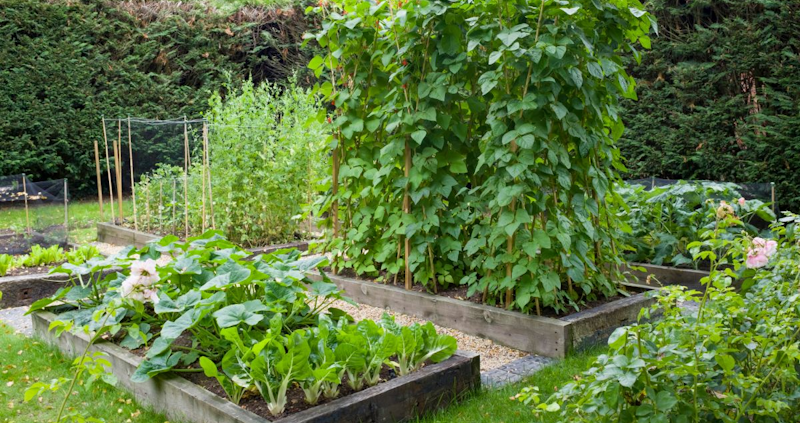
Prepare the soil effectively
One of the key steps to succeed in permaculture in Kentucky is soil preparation. By avoiding traditional methods of tilling and soil disturbance, permaculture promotes soil life, biodiversity and abundant production. Firstly, it is important to ensure that the soil is not intensively tilled. To do this, the best tool is the tiller, since it has an adjustable working depth. If you are looking for more information about this tool, click here.
Here in a few steps, how to repair your soil to plant a self-sufficient vegetable garden:
- Choose a shaded area with good water irrigation
- Incorporate organic compost to enrich with nutrients
- Mulch with organic materials
- Practice crop association to optimize interactions between plants
- Create crop mounds to promote drainage and water retention
- Implement crop rotation to avoid soil depletion and disease
In short, it is important to avoid the use of chemical fertilizers to preserve the soil ecosystem. Despite the fact that the production is less than that obtained using chemicals, the harvests from your vegetable garden would be healthier.
1st tip: plan the layout of the vegetable garden
Establishing a self-sufficient vegetable garden begins with careful planning of plant arrangements. Indeed, permaculture guides towards a strategic design approach, leveraging key elements such as zones, sectors and guilds.
It is essential to rigorously identify the various areas of your garden, taking into account exposure to the sun, humidity level, as well as accessibility. It is by fully understanding these characteristics that you will be able to create an optimal layout.
Additionally, don’t underestimate the importance of incorporating natural elements already present, such as trees or ponds, into your design plan. These elements can not only act as aesthetic assets, but also go a long way in maximizing the productivity of your vegetable garden. With this in mind, the idea of introducing complementary plant guilds is particularly relevant. This approach makes it possible to cultivate plant species that support each other.
2nd tip: rotate crops
Implementing a crop rotation proves to be a judicious and effective alternative to guarantee the sustainability and health of your self-sufficient vegetable garden. This practice, dear to permaculture, is based on the principle of changing the location of crops from one season to the next, thus avoiding the impoverishment of the soil and the spread of diseases.
By adapting vegetables to each season, you take advantage of optimal climatic conditions. In spring, focus on fast-growing vegetables like radishes, lettuce and spinach, which thrive in cooler temperatures. In summer, turn to heat-tolerant options, such as tomatoes, zucchini and peppers. In autumn, focus on root vegetables like carrots and potatoes, as well as leafy vegetables like cabbage and spinach, which appreciate milder temperatures.
By adopting crop rotation, you optimize the use of soil nutrients in a balanced way. Each type of plant has specific nutritional needs. By alternating crops, you prevent excessive depletion of certain vital substances, while promoting their natural replenishment. This helps maintain rich, fertile soil over time, ensuring abundant, high-quality yields.
3rd tip: carry out ecological maintenance
A thriving self-sufficient vegetable garden requires regular maintenance. Permaculture promotes sustainable gardening practices such as selective pruning, crop rotation, and manual weed removal. Limit the use of chemical fertilizers and pesticides by promoting soil health through natural methods. Ground cover and mulching help retain moisture, prevent soil erosion and maintain ecological balance.
Avoiding food waste in Kentucky
In Kentucky, as in many other regions in the USA, combating food waste is a crucial endeavor for both environmental and humanitarian reasons. This will limit the number of dumpster rentals sending junk to the local landfills. With a rich agricultural heritage and a thriving culinary culture, Kentucky possesses the resources and creativity to address this issue effectively.
One approach is community education on proper meal planning and storage techniques to extend the freshness of perishable goods. Encouraging residents to buy locally sourced produce not only supports farmers but also reduces the carbon footprint associated with transportation and storage. Partnering with food banks and nonprofits to redistribute surplus food to those in need helps alleviate hunger while minimizing waste.
Initiatives promoting composting and recycling food scraps can significantly reduce landfill contributions and generate nutrient-rich soil for gardening. Implementing policies at the governmental and organizational levels to incentivize businesses to donate excess food instead of disposing of it further enhances these efforts.
By fostering a culture of mindfulness and resourcefulness, Kentucky can lead the way in minimizing food waste, preserving its agricultural bounty, and nourishing its communities for generations to come.